Iedere dag bieden wij GRATIS software met licentie waarvoor je normaliter moet betalen!

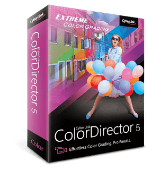
Giveaway of the day — ColorDirector5 LE
ColorDirector5 LE werd aangeboden als een giveaway op 16 maart 2018
Kleurcorrectie is essentieel voor het uitlokken van reacties van je videoviewers.. ColorDirector is een pro-level kleurcorrectiesoftware verpakt in een intuïtieve suite die het voor iedereen makkelijk beheersbaar maakt.
Deze versie beschikt over:
- Importeren formaten: MP4/H.264 (met Windows 7/8/10 in-box MP4 codec), AVI, WMV (ondersteunt geen MKV, MOV, FLV);
- Exporteren formaten: MP4/H.264 (met Windows 7/8/10 in-box MP4 codec), WMV (ondersteunt geen MKV, M2TS, XAVC-S);
- Beeldverhouding/resolutie: 16:9, tot 1080/30fps (ondersteunt geen 9:16 & 360-graden);
- Kleurcorrectietools: basic tools (z/w, tint, kromme, scherpte, ruisonderdrukking, kleurvervanging, vignet, kleurverschuiving, kleurenpreset).
The current text is the result of machine translation. You can help us improve it.
Systeemvereisten:
Windows 7/ 8/ 8.1/ 10 (x32/x64)
Uitgever:
CyberLink Corp.Website:
http://www.cyberlink.com/stat/edms/Giveaway/GOTD/CDR5LE/index.jspBestandsgrootte:
684 KB (162.43 MB the final size)
Prijs:
$59.99
Andere titels

Met een intuïtieve interface en een ongeëvenaarde functieset biedt PowerDirector high-end performance bewerking voor standaard en 360º video. Gebouwd voor flexibiliteit, en toch krachtig, blijft PowerDirector de beste oplossing voor videobewerking voor iedereen, of het nu beginners of professionals zijn.

De definitieve fotobewerkingsoplossing, PhotoDirector9 beschikt over een brede reeks aan gemakkelijk te gebruiken tools voor het maken van prachtige familiefoto's, reis- en landschapsfoto's en perfecte portretfoto's. Geleverd met een ongeëvenaarde set ondersteunde RAW formaten, lens profielen en nu ook het creëren van beelden van 360º foto's en video's.
Reactie op ColorDirector5 LE
Please add a comment explaining the reason behind your vote.
Here are the current limitations i found so far in this Edition.
Disabled/missing in this version or requires a paid upgrade:
-> Adjustment -> Manual -> Histogram
- Apply a color look-up table
-> Adjustment -> Manual -> Regional Adjustment Tools -> Selection Mask
- Blur
-> Adjustment -> Manual -> Regional Adjustment Tools
- Motion tracking mask
-> Adjustment -> Manual -> Regional Adjustment Tools -> Gradient mask
- Blur
-> Adjustment -> Manual -> Regional Adjustment Tools
- Radial filter
-> Adjustment -> Manual -> Global Adjustment Tools
- HDR Effect
- Split Toning
- Blur
- Color Splash
-> Production -> Video File
- H.265 HEVC
- MPEG-2
Pros
--------
Scene Detection
- allows you to find or look for specific scenes in the video, you can remove individual scenes or merge them, it even supports CTRL+Mouse left or SHIFT+Mouse left selection
Video Trimmer
- self-explanatory
Video Cutter
- self-explanatory
Adjustments
- Various options to change how the video looks
Masks
- Allow you to apply adjustments to specific areas in the video
- Masks can be applied on top of each other (usage example https://pixnio.com/nature-landscapes/field/grass-nature-tree-sky-landscape-plant-field-summer : the first mask gives more blue tint to the sky, the second mask makes the grass greener and the third mask makes the shadow from the tree less dark)
- You can create and save new masks for later use
Preset Management
- Allows you to create new presets and folders for them, which helps you organizing them
DirectorZone integration
- Allows for Preset downloads https://directorzone.cyberlink.com/colordirector/
4K Support
- Export to 4K possible
Sharing option
- Allows to directly upload to YT and Vimeo
Cons
--------
Presets
- Only a few included and not really great looking
Workflow
- Lots of functional limitations that may break the workflow due to upgrade nag/pop-up
Downloaded and installed on Windows 10 without difficulties, although the setup.exe is just a frontend that connects to the internet to download the *real* software installer which then has to install after downloading.
I use Adobe Lightroom for editing photos. ColorDirector5 seems to use a similar approach for videos and I was surprised at how much it feels like Lightroom's approach. For me, that was a good thing. I did not read any instructions or watch the available tutorial videos. I just opened a short .MOV clip I took this summer with my DSLR. It was slightly confusing that I had to drag the opened clip to a Storyboard, but, it is a movie editor so it does make sense that there is a Storyboard I guess--I was thinking this would just be a single clip editor, but it appears you can string clips together which seems like a nice feature (though I have not actually tried that yet).
I was quickly able to adjust the vibrance and saturation to my liking--very easy and intuitive controls. I played around with the other controls for adjusting individual colors' saturation, brightness, and hue--again, intuitive controls. I liked that the software also offered an option to click on a color in the video itself and then you could drag up and down to adjust that color's saturation, brightness, or hue.
I then exported the clip to MP4 format, although M2TS was also an option for higher quality. Some of the output options do require "upgrading" (presumably for a fee--I didn't check that out), but the options included were good enough for my needs. The time it took to export the clip seemed reasonable to me--not particularly speedy, but not unbearably slow either. The resulting clip appeared of good quality--no noticeable degradation to my eye; and, the adjustments made were accurately reproduced in the exported clip.
I was surprised but pleased with what a very nice piece of software this is. If you've been looking for something to enhance or modify the color features of a video, this strikes me as a very nice option for free. Thanks, GAOTD!
ReasonablyImpressed,
" It was slightly confusing that I had to drag the opened clip to a Storyboard..."
If/when you look at NLEs [Non Linear (video) Editors], I think you'll find that the more usual approach is to have your clips on several tracks with a timeline. Where I have seen story boarding used, I think the intent was to make it less confusing. Using a timeline OTOH makes it quicker/easier to edit the individual clips, plus you can do stuff like overlays, pip etc., but it can seem like overkill for less complicated projects.
"I then exported the clip to MP4 format, although M2TS was also an option for higher quality."
Those are just container formats, having nothing really to do with the quality of the video inside. Your original .mov file [which according to the ad copy you shouldn't be able to import], .mp4, & .m2ts can all hold identical H.264 video.
"If you've been looking for something to enhance or modify the color features of a video, this strikes me as a very nice option for free."
FWIW, I think one of the most common uses for something like Color Director, which is often part of the NLE software itself, is to make clips shot at different times with different lighting look the same. Another reason that's a bit less important today, now that TV broadcasts are digital, was to make sure the video was "legal" -- that the equipment could actually broadcast those colors. It is often used to give video a mood or feel. It is cool that CyberLink is being so generous with today's GOTD offer. If you want or need more however, & don't mind the learning curve, Davinci Resolve started out in life strictly for pro color correction, evolving into a capable NLE, & it's always free.
Sound codec seems to be always AAC regardless what the original codec was. Not a big problem but might be worth to know.
I downloaded it and worked fine with me, it is like an app for photo editing, but edits videos instead.
But I felt that it could be not so easy for everyone to work with in first time, so here is how it works:
After adding the video, the movie should be added to "story board" by pressing right click on your mouse, then opening "Adjustments" and there either put some filter (called "presents") or do a Manual changes with contrast, saturation, ...etc , not all of them are working directly, some features need upgrading (or maybe I couldn't register correctly, I don't know)
There is also a "Trime" button in shape of scissors and "delete scenes" button next to it.
Later after doing these, to export the video, press on "Production" and choose WMV because it is better because there is the chance to choose between different resolutions including VGA and 4K. Or if you are choosing H.264 then choose USA to be able to do these and also add Dolby Digital (didn't try it so not sure if it make a change in sound) and then pressing Start will create the video.


"ColorDirector5 LE"
Vandaag een losse Setup met een code in de Readme.
De Setup is klein en is een downloader, voor een bestand van 165Mb:
https://www.dropbox.com/s/qbjjw4rg719cyob/Inhoud_GOTDzip.png
Er wordt direct contact gezocht met het internet met meerdere punten:
https://www.dropbox.com/s/vj1go249efav0kl/Internetcontact.png
Er wordt korte tijd geboden om de download-map aan te passen:
https://www.dropbox.com/s/u4mau5r92weuguh/DownloadVenster.png
En nog een contact met een ander IP-adres:
https://www.dropbox.com/s/nel1s53anpn357r/Internetcontact-2.png
De Setup heeft een taalkeuze, geen Nederlands:
https://www.dropbox.com/s/11wwy5fs63qbqju/Setup.png
Bij de start van het programma wordt er gelijk contact gezocht met het internet:
https://www.dropbox.com/s/ncrfn06gotacmdp/Internetcontact-3.png
En de registratie kan gelijk worden uitgevoerd:
https://www.dropbox.com/s/lekipvnxjpnp9jm/Registratie.png
Waarna er nog een paar contacten zijn:
https://www.dropbox.com/s/37s4jn0vs8bx2bl/Internetcontact-4.png
Het hoofdscherm:
https://www.dropbox.com/s/byd32eeosxq7qs5/Hoofdscherm.png
De importmogelijkheden:
https://www.dropbox.com/s/nns1l19fddpfefn/Import.png
Er zijn verschillende video's geladen en er is verschil in FPS(daar komt later een melding over):
https://www.dropbox.com/s/hz4y53tugm76m5u/VerschilGeladenVideo.png
De Settings:
https://www.dropbox.com/s/6ue1z0ldhsf4x73/Settings.png
en: https://www.dropbox.com/s/oj2sahzzcxh2iv3/Settings-2.png
Taalkeuze:
https://www.dropbox.com/s/cfpyytmb0h0edgn/Taalkeuze.png
En bij het aanvinken van een optie blijkt niet alles te selecteren te zijn(later meer):
https://www.dropbox.com/s/rvtan3fvzb83w4f/Pech.png
Melding over FPS:
https://www.dropbox.com/s/2bcufqrbze9gowq/MeldingFPS.png
Er is een optie om scenes te herkennen(deze video is geen goede kandidaat ervoor; slechts één scene):
https://www.dropbox.com/s/d7ecvm5i5wjvcx8/ScenesHerkennen.png
Met de hand zijn er wel losse scenes aan te maken:
https://www.dropbox.com/s/4owy6x13qlryn5a/ScenesHandmatig.png
Een verandering in Tone:
https://www.dropbox.com/s/zc5rprme28o57s4/ToneInstelling.png
Bij het produceren blijkt ook weer, dat niet alles ondersteund wordt. Niet altijd helder welke instelling wel of niet ondersteund wordt. Dus misschien stuk voor stuk aan/uit zetten:
https://www.dropbox.com/s/ivt406n8itooght/Pech-2.png
Pas na de gereedmelding erachter gekomen, dat de uitvoermap niet aangepast was. Deze staat standaard in Documents, terwijl er in Windows ook altijd een Video-map aangemaakt is:
https://www.dropbox.com/s/0r2s7j5ypxytd0y/Gereedmelding.png
Er is een optie om meer Presets op te halen, maar daarvoor moet er wel ingelogd worden(niet uitgetest of dit met een ander Cyberlink-account zou kunnen:
https://www.dropbox.com/s/jwwizc6e7n92fv1/DownloadenPresets.png
Een tweetal resultaten van zomaar wat instellen, knippen, plakken etc.:
Een MKV van 11,5Mb:
https://ootjegotd.stackstorage.com/s/w2cSct9PRFmhfQb
En een MP4 van37Mb:
https://ootjegotd.stackstorage.com/s/0HBSQ55joTsZ9gg
Ootje
Save | Cancel
Alles op een rij:
https://www.dropbox.com/sh/bwx5wqmznv46emr/AACUZgxdTRK0WTxbJspc_F8va
Save | Cancel
LE...
met deze : https://www.youtube.com/watch?v=KlTQKmty_28
waarin deze colordirector is besloten zie je hoe en wat.
Je zal flink wat werk moeten verzetten voor je een resultaat krijgt zoals je dat verwachtte...
Ook een goede videokaart met flinke geheugenbanken en processorgebruik door de software zijn eigenlijk een must.
Ootje geeft later wel info over installatie en verschillen LE en gekocht pakket...
Save | Cancel